
Creating a Dash application
Before deployment, the first step if of course to create your own application.
You can follow the guidelines in Dash official documentation https://dash.plotly.com/installation

Deploying your Dash application
https://dash.plotly.com/deployment Dash/Plotly offers a paid service to super easily deploy and manager your applications. Yet as most of it is open source, and you may want a simple thing for a prototype, you can simply deploy it in your own server.
Then you have several options:
- Beginners - Deploy it on a simple Heroku server
- Advanced - Deploy it on a cloud server (AWS, GCP, Azure) with docker containers
Deploying on Heroku from GitHub
Heroku is the most simple server provider. It's even more simpleYou can create and deploy apps for free in just a few minutes. That's what we are going to do here :
- Create your dash app, eg
app.py(from Dash tutorial)
# -*- coding: utf-8 -*-

# Run this app with `python app.py` and
# visit http://127.0.0.1:8050/ in your web browser.

import dash
import dash_core_components as dcc
import dash_html_components as html
import plotly.express as px
import pandas as pd

external_stylesheets = ['https://codepen.io/chriddyp/pen/bWLwgP.css']

app = dash.Dash(__name__, external_stylesheets=external_stylesheets)
server = app.server

# assume you have a "long-form" data frame
# see https://plotly.com/python/px-arguments/ for more options
df = pd.DataFrame({
    "Fruit": ["Apples", "Oranges", "Bananas", "Apples", "Oranges", "Bananas"],
    "Amount": [4, 1, 2, 2, 4, 5],
    "City": ["SF", "SF", "SF", "Montreal", "Montreal", "Montreal"]
})

fig = px.bar(df, x="Fruit", y="Amount", color="City", barmode="group")

app.layout = html.Div(children=[
    html.H1(children='Hello Dash'),

    html.Div(children='''
        Dash: A web application framework for Python.
    '''),

    dcc.Graph(
        id='example-graph',
        figure=fig
    )
])

if __name__ == '__main__':
    app.run_server(debug=True)
- Create a requirements file, eg
requirements.txt. You can use tools such aspipreqs,pipenvor other environment managers to help you create the right file. - Don't forget to add if not present the requirements to
gunicornin your requirements file - Create a Procfile - it's a text file to help Heroku understand what file to be launched on the server. Write in it the following command.
web: gunicorn app:server
- As of
2020-12-01, Dash documentation is not totally correct when it comes to deployment on Heroku, you should correctly link the server variable in Python and the declaration in theProcfile:
# Add following line in your app.py script
server = app.server

# Write the Procfile
# - app refer to the file name app.py
# - server refer to the variable name for the Flask Server
web: gunicorn app:server
At the end your repo on Github should look like this:
app.py
Procfile
requirements.txt
Deploy directly on Heroku from GitHub, you can follow the instructions below
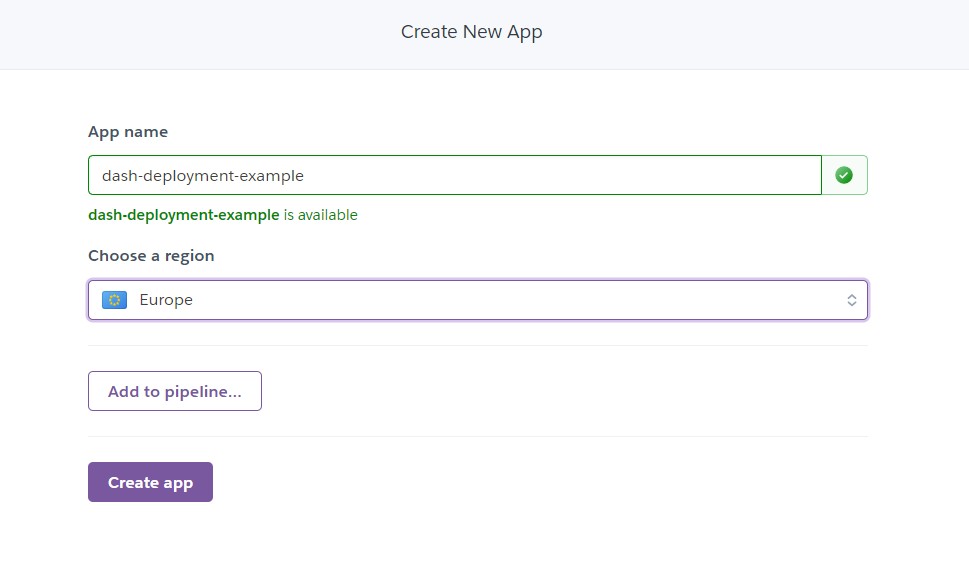
Create a new application

Find the right name and server region
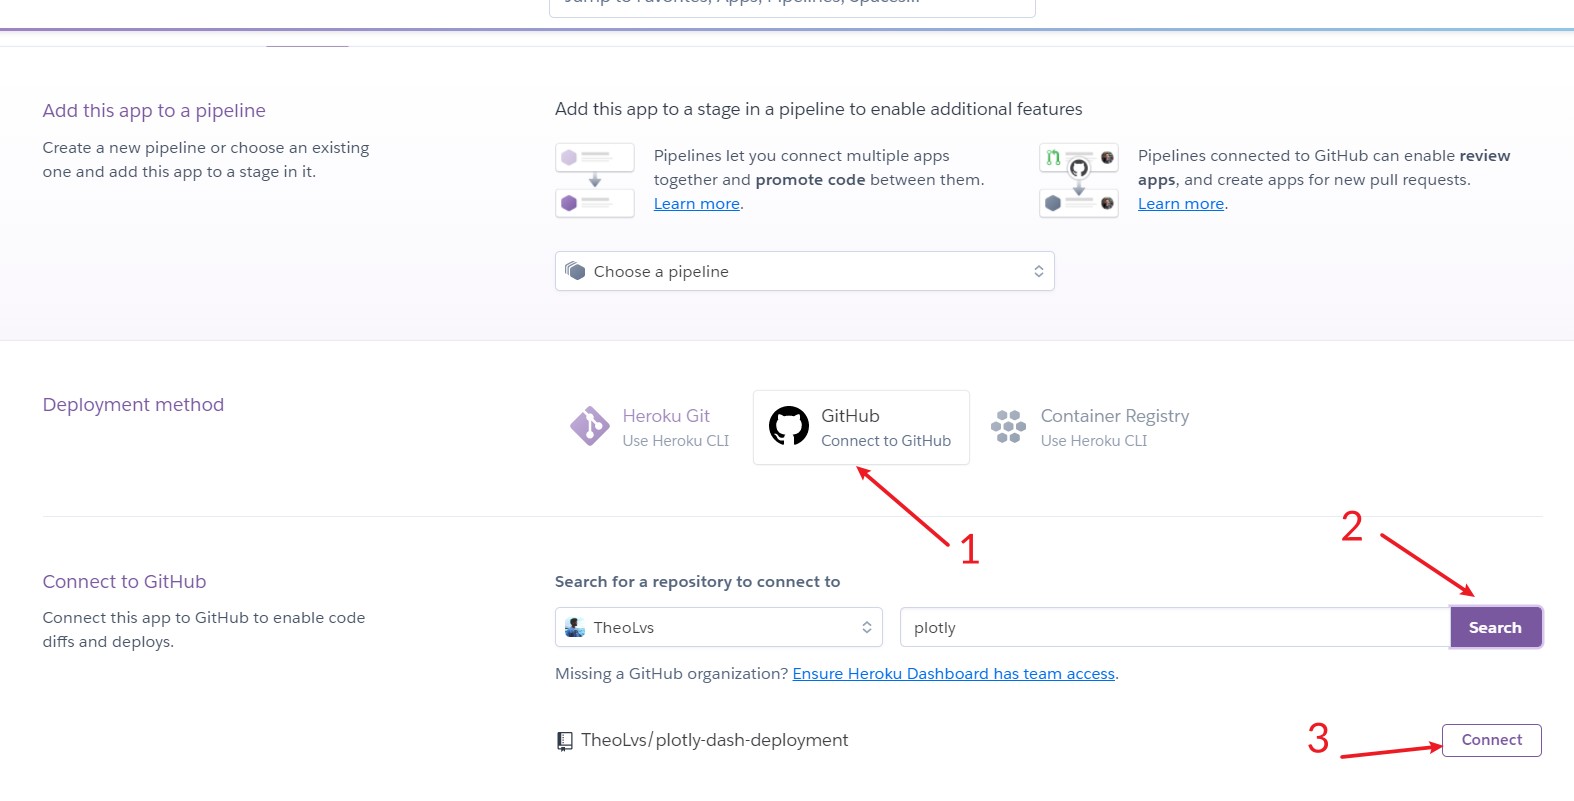
Link via github, search for your repo and click on connect
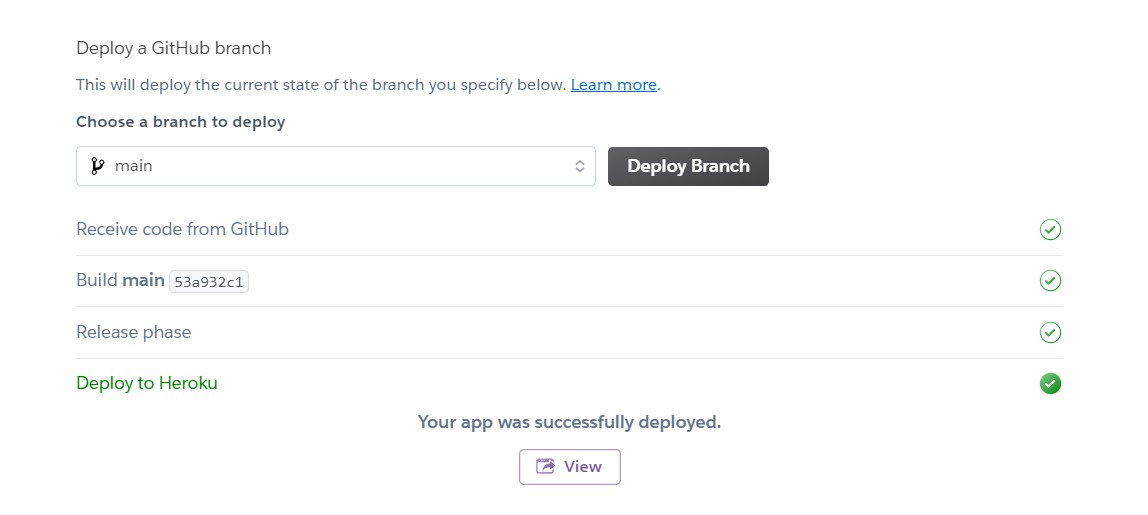
Deploy manually by clicking on deploy and choosing the right github branch

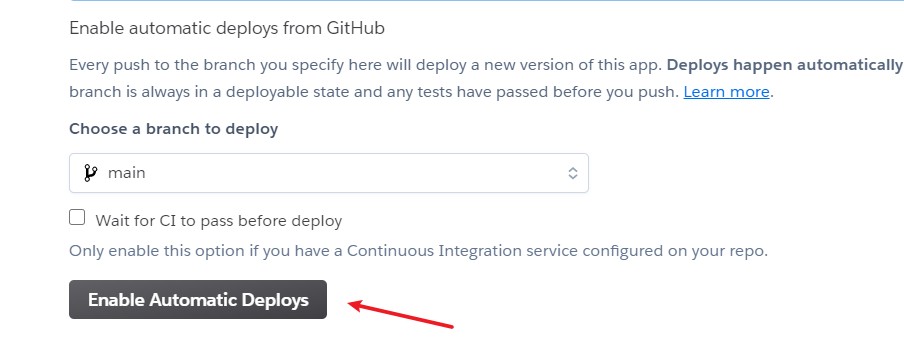
You can even set up a CI/CD process with auto-deploys by playing with the auto-deploy section
You are all set ! Your app should be live !
Problems you can encounter
- Having your app not at the root of the repo, you can use subdir buildpack
- Not linking correctly your server in the Procfile
- Having difficulties to link with a database
If your app does not work, you can check in the logs why it failed :
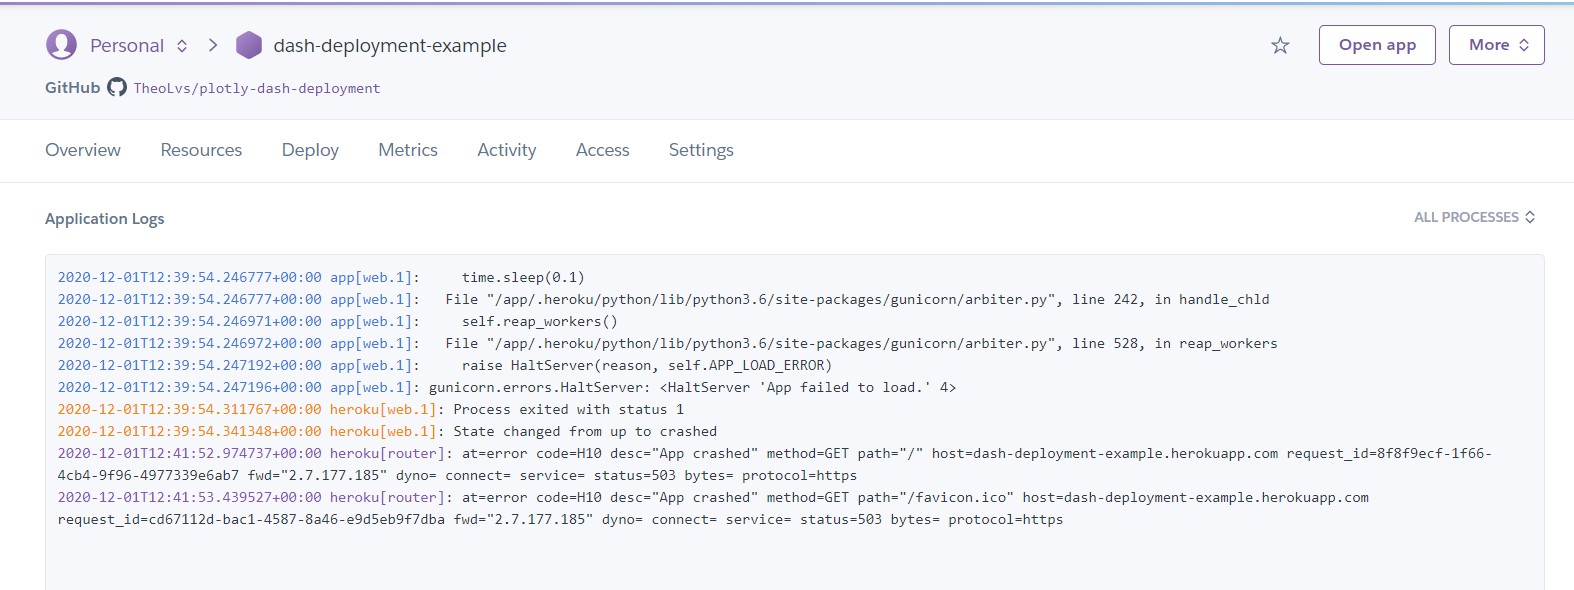
What Heroku is doing under the hood
Heroku does a lot for us actually. It detects the technology behind the web server pushed on Heroku (Python, Node, etc...). Looks for a Procfile with instructions on how to launch the server. And knows many things on how to set it up.
For example for Python servers, it will look first to find a requirements.txt file or pipenv.lock file. For a Node.js server it will look at the package.json and the lock file as well.
Deploying with Docker
If you want to better master what you are deploying. You may want to use Docker. It's actually universal and you'll be able to deploy it almost anywhere.
I just google searched "Dockerfile Dash" and found a suitable example as a template https://github.com/jucyai/docker-dash/blob/master/Dockerfile
How does it work? You will setup a virtually empty server with nothing but python 3.9 and the application, i.e a Container.
FROM python:3.9

ENV DASH_DEBUG_MODE True
COPY ./app /app
WORKDIR /app
RUN set -ex && \
    pip install -r requirements.txt
EXPOSE 8050
CMD ["python", "app.py"]
Using this Dockerfile you could be able to deploy anywhere from GCP to Azure or even Heroku.
Going further
To better deploy, it's always interesting to learn more about what you are manipulating. Here, you have to know that Dash is a wrapper for other technologies put together, and in particular:
- Flask as backend and server
- React as frontend
- Plotly (the python library) for most graphs
If you want to be a Deployment ninja 🐱👤, you may find useful to learn more about Flask and webservers in general. And eventually learn about React.
Adding databases
What is recommended is to avoid storing your database in the same server. You should approach the problem with a "microservice" mindset, meaning that you should put your database on another server.
- Indeed, it means you have to do another deployment, maybe using Docker again to expose your database correctly
- But, it also decouple your app in production with the database, allowing you for more modularity (requesting the database in other platforms)